

Yesterday I rattled on about buying and cleaning vintage curtains. After my curtains were all nice and clean I needed to hang them up! But, as you all saw (and Emma pointed out) the curtain rods in our living room were dunzo. They were bent and gross. Plus they only went the length of the window.
Curtain rods, especially for 8 foot curtain rods like I need, are expensive and I am cheap. I took myself over to Amazon where I found this nickel rod
Back in the day I moved into my first solo place and didn't have money for fancy curtain rods, but had lots of windows. I got the idea to use rigid copper plumbing pipe. It was inexpensive and looked awesome. The price of copper skyrocketed in the intervening years, so it's not longer as affordable an option

Instead I went to the local big box and bought a ten foot length of electrical conduit. For two bucks. That's right. $2. The lumber department cut it down to eight feet at no charge (and I got to keep the extra two feet. We all know a project will be coming forthwith with the spare length). (See how bent the old, black rod was?) (How many parenthesis can I use in one paragraph?!)
I decided to go with the silver-y metal tones. We have lots of coppery and oil rubbed bronze going on in our house, but I do love chrome-y things. Everyone likes a little mixed metal action, right? But you could totally spray paint the rod ORB (or whatever) and get finials and curtain rings to match.

Of course, every curtain rod needs finials. Over to the cabinet hardware section I went. After some digging I found vintage-y chrome knobs for $1.06 each.
So for a grand total of $4.06 I had everything I needed to DIY a drapery rod.
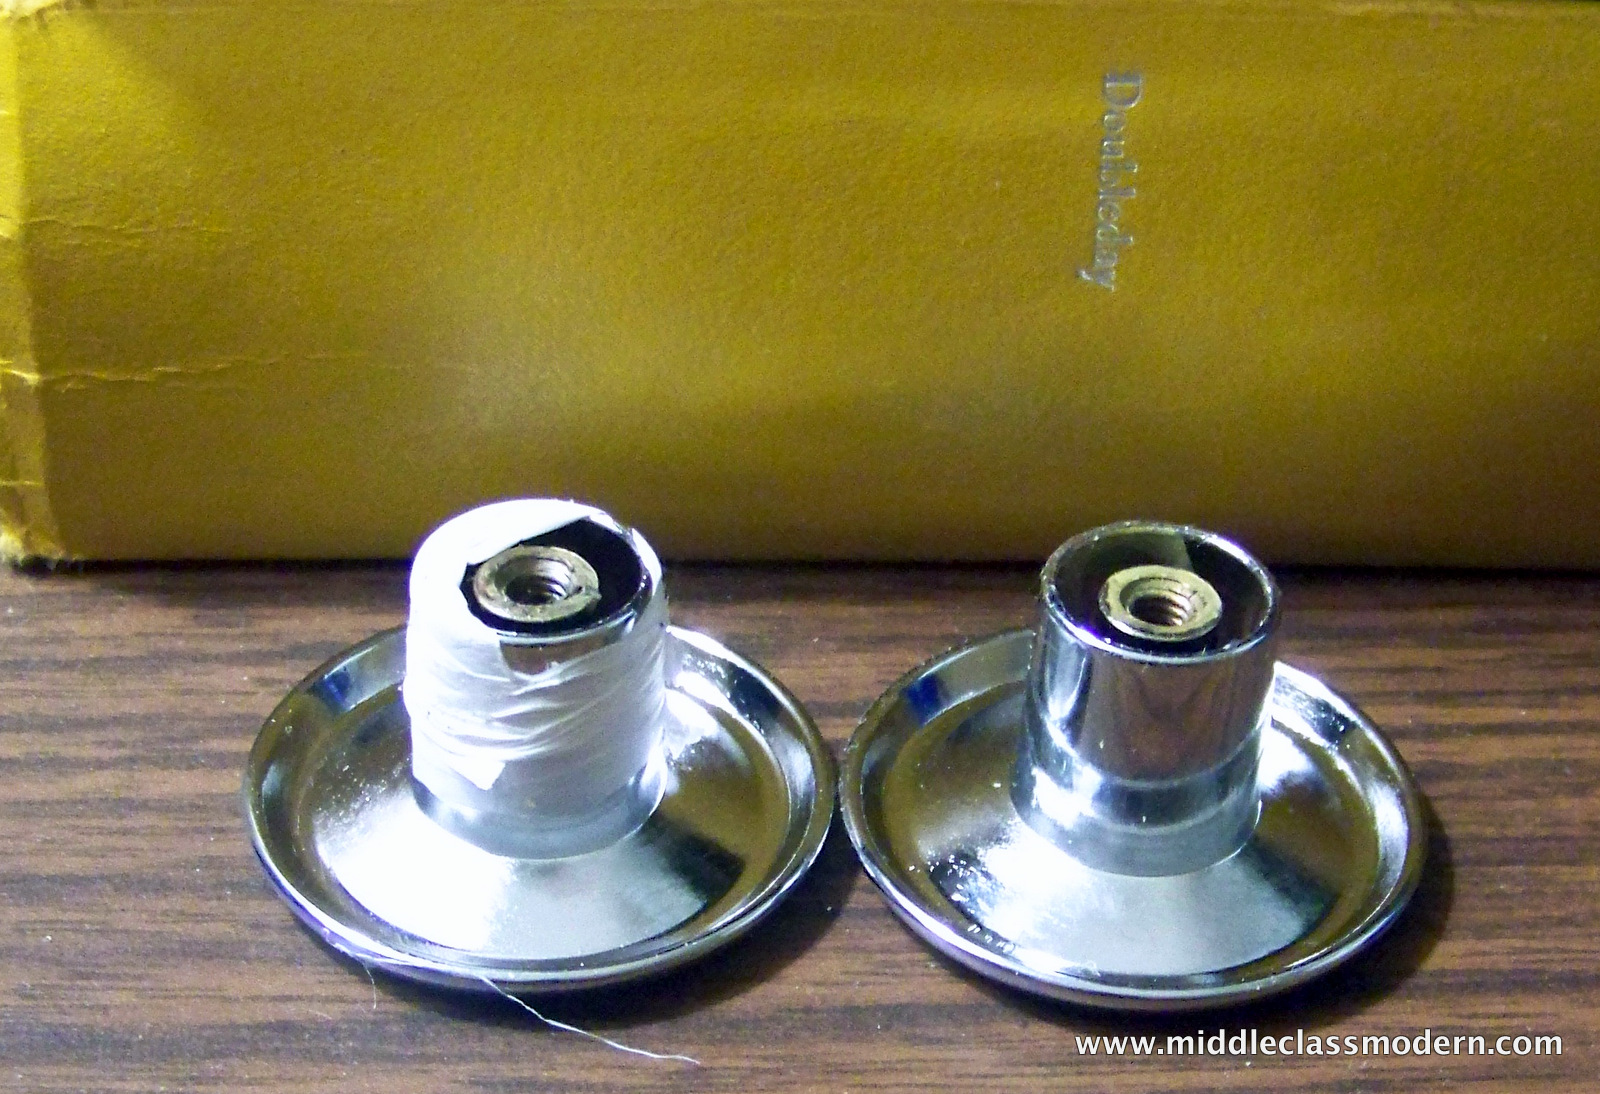
I wrapped the end of the knob with a little thread tape (if you don't have any thread tape, it's about a dollar) and just inserted one knob into the end of the rod (I'm really fighting the urge to crack some insanely dirty jokes here).
[Note from J: Use thread tape because it's slightly rubberized and gives it better grip. It's the best alternative to soldering.]
Next I put my curtain rings on the rod, and did the same tape wrap-py, insert-y deal on the other end.

Now for hanging the drapes. Although I decided against going high with these drapes I did want to go wide. The window isn't really centered on the wall. This led to confusion with the credenza. Should I center it to the wall or to the window? With a curtain rod that almost covers the entire width of the wall and with three drapery panels I can cheat the window so it appears centered and my furniture will look more balanced.
Also, hint? Take the clips off the rings. Put the rings on the rod and clip the clips to the curtain, the reattach clips to ring. Much easier.

I don't know if its the time of day or what, but I could not get a good picture of the curtains.


Close-up of the rod, ring. pleat situation.
Lessons learned? I should have starched the drapes when I ironed them. Two of them look okay, but the left most curtain already looks wrinkly. Sigh.
They do make the whole room look lighter and happier. I also could definitely close the curtains and they would completely cover the window. I think that's key for a good window treatment, because it gives it a certain richness. Plus, practical!
So, the total cost for the window treatments? $5 drapes, $4.06 rod, $4 clearance curtain clips.
A grand total of $13.06 for the whole shebang. Yeah, baby.
Linked up at The DIY Club.


huh! I never would have thought of that. Ten points for ingenuity!
ReplyDeleteYou are so sweet Emma. Heh.
DeleteWhen I moved into the Casablanca, the previous owners had made curtain rods out of long sticks from the trees. But they were old and rotten, so I had to replace then with newer rods. When my living room is FINALLY finished, I want one of those curtain rods that you pull a string to open and shut the curtains. Guess I need to start searching...
ReplyDeleteTransverse rods! Very cool. I plan on using those in my forever home.
DeleteI've totally made curtain rods out of the long bamboo sticks that come with rods. Basically...I really hate paying for curtain rods!
What a great idea for a curtain rod. It looks great! I love what it adds to your room. :)
ReplyDeleteThanks, Kenz!
Deletethat is SUCH a good idea, I never in a a million years would have thought of that.
ReplyDeletePoverty. Actually? I think Domino ran an article about using stuff from the hardware in your decor and it mentioned copper plumbing pipe as curtain rods.
DeleteHeh heh, you said rod. ;) I wonder what kind of SEO this post is going to pick up? :D
ReplyDeleteI actually rewrote the stick the knob into the rod section because it was out of control. I feared where this poor, innocent little blog would end up, SEO-wise!
DeleteGenius idea! Love it!
ReplyDeleteJenna @ rainonatinroof.com
Thanks!
DeleteHow inventive! Thanks so much for sharing on Super Sweet Saturday.
ReplyDeleteSteph
swtboutique.com
Ah, you are so great.
ReplyDeleteHint about starching drapes, especially shears. Use heavy dose of liquid starch, spin slightly, and then hang while still damp, and you can use clip-type clothes pins to make the pleats (if they have pleats) up and down the pinch-pleat drape. If curtains, just hang, space the way they would be when they are dry.
ReplyDeleteI've NOT done drapes, but have 40 yr old pinch pleat shears which, with using the heavy liquid starch, appear the same as when they were new! (they have body!!!) No ironing required! The heavy starch keeps the dust/dirt OUT of the curtains!
Just some trivia - Daughter shows horses and they starch their jeans (almost stiff!) so the dust/dirt won't get into the fabric.
What a fabulous idea to make your own curtain rods!! Featured you tonight on our Facebook page!
ReplyDeleteTake care,
Trish
Oh wow. So the cabinet knobs (heh) fit into the conduit with nothing but thread tape? Genius! I will be trying this!
ReplyDeleteYep, just the thread tape. That was J's brilliant idea. In that past I've used an at-home soldering kit, which was a lot more complicated!
Deletewhat did you use for the brackets? I am so ding this in my sunroom where i need long rods. thanks
ReplyDeleteI used the super cheap metal brackets from the drapery section and spray painted them. Like these: http://www.amazon.com/Rod-Decor-Pair-Bracket-Black/dp/B0067NB0L2/ref=sr_1_3?ie=UTF8&qid=1364048693&sr=8-3&keywords=curtain+rod+brackets
DeleteThanks for stopping by!
Love this idea! You may have just saved us a ton of $$ , we have 3 huge windows, two huges doors and several smaller windows that all need window treatments.... And here the big box store costs mire than stateside (curtain rods here start at 40 US $ each! Yikes! )
ReplyDeleteThanks so much for the great idea!!
- Use Bamboo sticks as rods
ReplyDelete- Use 3M large hooks to hange
I considered this out of sheer necessity. I have a wall of 3 windows that requires 164 inches. Rods this long are extremely difficult to locate; and when you do they are over $100...ouch! I was thinking PVC pipe and paint made for plastic. Just wondering if the curtain rings would wear the paint off. What do you think? I need an oil rubbed bronze finish and cant get that from electrical conduit like you used. Added note: I am concerned about finials since I'm thinking 1-1/2 to 2" pipe (bigger because I have 10' ceilings and my drapes are 9 feet long.) Any ideas what to use for finials???
ReplyDeleteHow about thrift store/salvage/new door knobs? You could superglue them on to the pipe.
Delete