Even as we struggled to find a color palette that worked with J's dark leather sofa and our living room's cave-like light, I knew I wanted to use bright blue as our main accent color. It's bright, it's happy, it's color we both like (important!), and it ties in to the fact we live at the lake. So one of the first things on my "We Really, Really Have to Buy" list were lamps for the living room. I wanted a matching pair, and I didn't want to spend more than $12 for the set. Lamps are one of those things where I just can't spend money. Thrift stores, yard sales, and other resale places are full of lamps. Most of them, undoubtably, are hideously ugly. But if you look past horrid colors and terrible patterns, you'll see nice shapes. Zero in on the nice shapes. Lamps are so very easy to fix. So we found this set of lamps for $10. For the pair! Yes ma'am! So while the 1980s flower power pattern isn't my taste, the classic Chinese vase shape is. No complaints there. And they even came with shades.
 |
| Ugly pattern, cute lamp...painting supplies at the ready! |
 |
| Painted, but the stinky shade remains |
The first step was to cut the collar and sleeves from the shirts. Then I cut and ripped the old, nasty fabric from the lamp shade. After a quick wipe down, I set to work on recovering the frame. (I really, really wish I'd spray painted the frame at this point.)
 |
| Naked Shade! |
This is a simple, back-stitch diagram:
E FC DB A
The needle comes up from the bottom of the cloth at A, C, and E. Check out Jenny's superior tutorial for much, much better diagrams.
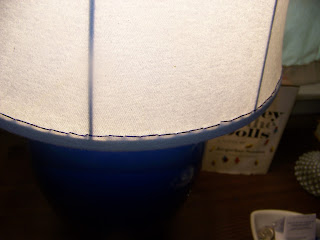
After sewing the top and bottom hems, pull out the straight pins. Here's a close up of my stitched shade:
Do any additional trimming needed. And...you are done! These are the cheapest lampshades ever! And so easy! I spent maybe 90 minutes doing both, and I was watching Bravo at the time. So...I was probably distracted by the nonsense displayed by a random Housewife of Some Place. I did these about six months ago, and the shades still look great! Here's lamp one, with the light on (the ugly curtains behind are soon to be history, thanks to the Fall Pinterest Challenge, which I will unveil on Tuesday!):
See this post at Snap and Someday Crafts.


Those look great! Love it.
ReplyDeleteThanks!
ReplyDelete